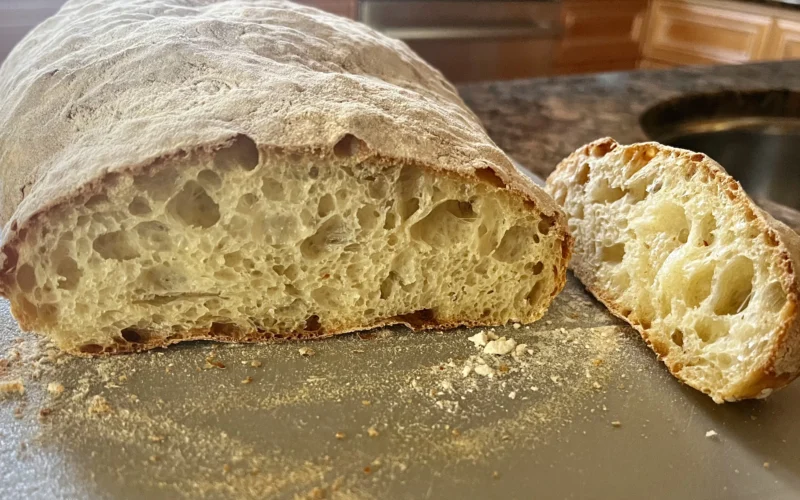
Master the stretch and fold technique! Stronger Dough, Better Bread! Easy Steps, Big Results! Fluffier Loaves, Less Effort! Learn how this simple technique can take your homemade bread to the next level!

The stretch and fold technique is a gentle method of strengthening bread dough without the need for traditional kneading or expensive equipment like a stand mixer. It helps develop gluten structure, improve dough elasticity, and promote even fermentation. This method is commonly used for high-hydration doughs like sourdough and focaccia.
I personally prefer this technique as it is gentler on the dough and provides me with a better rise and crumb in the final product. It is more time-consuming than letting my mixer do all the work for me, but it’s worth it.
How to Perform the Stretch and Fold Technique
Step 1: Prepare the Dough
- – After mixing the dough, let it rest for 20-30 minutes to allow hydration (autolyse phase).
Step 2: First Stretch and Fold
- – Lightly wet your hands to prevent sticking.
- – Gently grab one side of the dough and stretch it upward without tearing.
- – Fold the stretched dough over itself towards the center.
- – Rotate the bowl 90 degrees and repeat the process on the next side.
- – Perform this action for all four sides of the dough.
Step 3: Repeat the Process
- – Perform 3 to 4 sets of stretch and folds at 20 to 30-minute intervals during the first 1-2 hours of bulk fermentation.
- – Each round strengthens the dough, making it smoother and more elastic.
Step 4: Final Rest and Fermentation
- – After the final stretch and fold, let the dough ferment undisturbed until it has risen sufficiently.
- – The dough should feel airy and strong, ready for shaping and proofing.
Benefits of the Stretch and Fold Technique
✔ Strengthens Gluten – Creates an open, airy crumb.
✔ Improves Dough Elasticity – Helps with better structure and shaping.
✔ Enhances Fermentation – Encourages gas retention for a better rise.
✔ Minimizes Overhandling – Prevents dense or tough bread.
Common Mistakes & Tips
- – Do not stretch too aggressively – gentle handling prevents tearing.
- – Let the dough rest between sets – This allows the gluten to relax and develop.
- – Use damp hands – prevents sticking and makes handling easier.
- – Watch for dough strength – it should become smoother and more elastic with each fold.
This technique is widely used for artisan breads like sourdough, ciabatta, and focaccia, ensuring a beautiful texture and structure.
When to Use Stretch and Fold
✔ High-Hydration Doughs – Essential for wet doughs like ciabatta, focaccia, or sourdough to build strength.
✔ Sourdough Bread – A critical technique to develop gluten when working with wild yeast and long fermentation times.
✔ Soft Doughs – Even lower hydration doughs can benefit from a few folds to improve structure.
How Many Stretch and Folds Are Needed?
- – Lower Hydration (60-65%) – 2-3 stretch and folds, spaced 30 minutes apart.
- – Medium Hydration (65-75%) – 3-4 stretch and folds over 2-3 hours.
- – High Hydration (75%+) – 4-6 stretch and folds, with a longer bulk fermentation.
Signs Your Dough has Enough Strength
✔ Holds its shape when lifted.
✔ Feels elastic and smooth instead of sticky or slack.
✔ Springs back slightly when stretched but remains extensible.
Final Thoughts
The stretch and fold technique is an essential skill for any bread baker. By practicing and observing how your dough responds, you’ll gain a better feel for fermentation, gluten strength, and overall dough health. Whether you’re making rustic sourdough or pillowy focaccia, mastering this technique will help you achieve beautiful, bakery-quality bread every time!
